 |
| The whole box. |
 |
| Detail of the decorative feet. |
 |
| Lid with extensive scroll work. |
Learning furniture and cabinet making at North Bennet Street School and hoping to make some beautiful work.
 |
| The whole box. |
 |
| Detail of the decorative feet. |
 |
| Lid with extensive scroll work. |
 |
| Then I fit the two halves back around the rings until they matched up perfectly.you can see the seem in the light colored pear wood, but not in the walnut. |
 |
| Next I cut away the extra wood with a straight chisel until it was almost flush with the metal and then filed the wood down with a jeweler's file until it was just recessed below the metal. |
 |
| Here are the finished rings with the box I made to hold them. |
 |
| This is a blurry picture of the breakfast in bed that I made Kelcey when I proposed. Strawberry and cream cheese stuffed french toast and mimosas. |
 |
| I started by cutting the finger joints for the fly rails. This is the part that you can pull out to holdup the leaf. |
 |
| Dry fitting the legs all the joints. |
 |
| Adding decorative stringing to the legs. |
 |
| A look at the full length of the stringing. |
 |
| One finished banding and two taped up and drying. |
 |
| Finished stringing and banding on the bottom of a leg. |
 |
| Finished stringing and banding on the tops of the legs. |
 |
| All the decoration done on the legs. |
 |
| Had kind of a disaster gluing up the drawer, but managed to get a ridiculous number of clamps on it. |
 |
| And it came out perfectly square! |
 |
| Finished drawer and the pieces for the top. That is a 24" ruler on the top for reference. |
 |
| First rule joint finished. |
 |
| Another view of the rule joint. |
 |
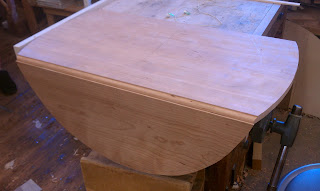
| Table top completed, leaves down. |
 |
| Table top completed, leaves up. |
 |
| Another view, leaves up |
 |
| Another view, leaves down. On to the finishing room. |
 |
| Laying out the shell carving on the knee. |
 |
| Finished shell carving |
 |
| Laying out and grounding the acanthus leaf |
 |
| Starting the stems. |
 |
| Developing the leaves. |
 |
| Finished acanthus carving. |
 |
| Four finished legs and applied shell before assembly. |
 |
| Finished and upholstered. |
 |
| Lance's photo |
 |
| Chippendale side chair with tree/leaf/flame design |
 |
| Dressing mirror with walnut crotch veneer |
 |
| Engagement/ wedding rings for Kelcey and I. Curly maple box. Walnut and pear rings from our respective families' land. |
 |
| Here's the finished product. Keep reading to see the whole process. |
 |
| Back legs cut out and shaped. Connected by the back seat rail. |
 |
| Oversized splat fit into back seat rail. Crest rail fit into back legs, but still needs to be fit to splat. Front legs cut to length. Back stretcher fit. |
 |
| Crest rail fit to splat. |
 |
| Piercings and shaping of splat started. |
 |
| Crest rail shaping started. Side seat rails fit. |
 |
| Shaping of crest rail and splat done. Front legs, front seat rail and side stretchers fit. |
 |
| Shaping from behind. |
 |
| Center stretcher in. Glue blocks in. Construction complete. |