 |
| I started by cutting the finger joints for the fly rails. This is the part that you can pull out to holdup the leaf. |
 |
| Dry fitting the legs all the joints. |
 |
| Adding decorative stringing to the legs. |
 |
| A look at the full length of the stringing. |
 |
| One finished banding and two taped up and drying. |
 |
| Finished stringing and banding on the bottom of a leg. |
 |
| Finished stringing and banding on the tops of the legs. |
 |
| All the decoration done on the legs. |
 |
| Had kind of a disaster gluing up the drawer, but managed to get a ridiculous number of clamps on it. |
 |
| And it came out perfectly square! |
 |
| Finished drawer and the pieces for the top. That is a 24" ruler on the top for reference. |
 |
| First rule joint finished. |
 |
| Another view of the rule joint. |
 |
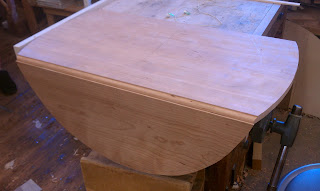
| Table top completed, leaves down. |
 |
| Table top completed, leaves up. |
 |
| Another view, leaves up |
 |
| Another view, leaves down. On to the finishing room. |

No comments:
Post a Comment